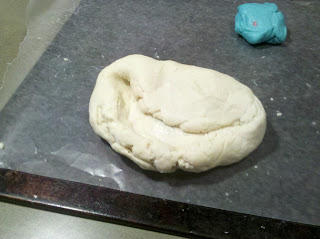
Anyways...I made a batch of some homemade clay (recipe here) and when I was done with that project, I had a ton left over. Even though it was super cheap and easy to make, I hate to waste, so I thought up this cute and easy project.
I babysit a 6 month old a few days a week and he was the perfect "model" for my project. Although, the most difficult part of this project is probably getting the baby to put their feet in the clay properly....
 |
| Dough/clay balls on a cookie sheet with wax paper. |
Next, I added glitter to the plain dough and kneaded it until there was a uniform (sorta) distribution of the glitter.
 |
| Using the pocket method to catch the glitter inside and then kneading helped minimize the mess |
I rolled it out into the shape I wanted. I used a sheet of wax paper on a cookie sheet and it made it easy to move the shape around and get the baby positioned right over it to put his feet in.
Now the tricky part...getting a baby to hold their feet still in clay and not scrunch up their toes...well good luck. It took me about 3 tries to get something I was relatively happy with.
Next roll out small circles of dough and flattened them. Then carve out the letters with a knife. Use a small tool to cut out tiny holes and tap in any "torn" edges. I like to use a wooden skewer for this. I have tons of them and they work really well.
Place the letters how you want them on the footprint shape. Now, I made mine rather big, but if you are making these with a younger (and smaller) child you can make them into ornaments which makes a lovely gift for people around the holidays.
Place the letters on the shape and gently press them into the dough a little bit. Note: you dont have to press hard at all! Just enough to give them a little stick. I love the raised letter look so I hardly pushed mine down at all.
Make holes for hanging. If it is smaller, you can make only one.
Depending on how thick you made it, it will need to be in the oven for 1 - 2 hours. About halfway through, when it is no longer soft anywhere on the face to the touch (be careful), turn it over to help bake the back side. (If you made it really thin, you wont have to flip it). It's done when it turns hard, remove it and let it cool.
Once cool give it a coat of clear enamel spray paint on both sides.
String your ribbon through the hole(s), hang up, and enjoy reliving the memories of how tiny they once were.
Yeah...the ribbon i have on it right now is not ideal...gonna go hunting for something prettier this weekend.
Oh and by the way, if you end up making holes so tiny it makes getting the ribbon through them difficult, a unbend paperclip and a pair of needle-nose pliers comes in super handy!
:) Happy crafting!


No comments:
Post a Comment